40 Blogs About Recycled Crafts

Recently the Lawn Care Service  website wrote an article about 40 blogs about recycled crafts. And guess who was on the list? This blog right here! The article (check out http://www.lawncareservice.net/) has a bunch of fantastic sites you guys should definitely check out, so head on over and give it a look!

As for me, I’m thrilled that there’s a lot more interest out there in this blog and I’m going to try to be more regular in posting tips, tricks and projects. I’m currently taking an art class, so hopefully there will be a bunch of ideas stemming from there.

How to make Jewelry out of Seashells

When I was a kid, I’d love scouring the beach for seashells. The problem is that I’ll never be able to use them for anything. Then, once I got older and into making jewelry, I thought, “hey! I can make jewelry out of these! All I need to do is drill a hole in them!” Of course, it’s not that easy, so here’s some tips and tricks for prepping your seashells for jewelry. Here’s an example of a piece I made on sale at my etsy store:

Materials:

  • clear nail polish or varnish
  • drill
  • a very small drill bit
  • a small ball of playdoh
  • shells (of course 🙂 )

Method:

  • take one shell and press into the playdoh–not too hard, you don’t want it to stick
  • use your drill and small drill bit to drill a hole through the shell
  • this will take a while. the playdoh helps give the shell a little wiggle room and take some of the tension away so the shell doesn’t break as easily
  • note: it’s likely that your shell may break anyway. Try not to drill too close to the edge, don’t drill contantly. stop drilling to allow the drill bit to cool down, then start again. Also, try to pick the thickest part of the shell for drilling
  • another note: sea-glass is a pain in the butt to drill: I learned that the hard way. It takes forever (maybe it’s the drill bit size?) and over all, isn’t worth the trouble. It’s possible that you may need one of the diamond-edged ones of whatever (but those are ridiculously expensive)
  • either before or after you drill, cover the shell in a layer of clear nail polish. If you aren’t going to drill them for a while, make sure to polish them within a few weeks of bringing them home. You know how it’s a lot more brightly colored when it’s wet than when it’s dry? The nail polish keeps them that bright color. After a while of laying around without being polished, though, the color fades. (another thing I learned the hard way)

Alright, I hope you guys check out my etsy store for more pictures of my jewelry (shameless plug, I know), and I hope you all make your own seashell jewelry. If you have your own tips and tricks or pictures of stuff you made, comment below!

Super Versatile Necklace!

So we all love reducing, reusing, and recycling, right? Well, how about reusing jewelry? And not in the “break and remake” way either. I’m talking about a piece of jewelry that can be worn a bajillion different ways.

I’ve noticed recently that the fashion world is into the large wooden jewelry. While I love the natural look and feel of them, I can never really pull off the chunky look, and I’m not too keen on the idea of killing trees for the sake of my jewelry. So, I made this:

Notice the many ways to wear it? And, since its blue and yellow: it can go with both cool and warm-colored outfits! Here I’ve had someone model it in black  and white, but it goes well with a variety of different colors. Plus, I used smaller faux-wooden beads from Pakistan. You get the look of wood, without the tree!

If you’d like a more detailed explanation, more pictures, or would like to buy them, please visit my etsy store here.

Beaded Butterfly Earrings

This slideshow requires JavaScript.

My latest creation! The Beaded Butterfly Earrings. The beads were bought from a street-stall in Pakistan, and the flower-chain was from a vintage necklace I found in an old, forgotten cupboard.

Materials: More

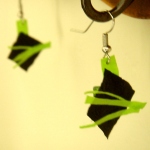
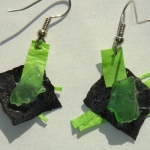
Neon Green Tree Branch Earrings

So I went to Saudi Arabia and the shopping bags there were all plastic–but of beautiful greens and blues and reds. And when I saw these beautiful bags lying in the trash (or worse–not in the trash), it made me think of what beautiful stuff I could make if I fused the plastic bags together. So here’s how I made these earrings. More